Up-Cycling: Unwanted Tees

I keep seeing the cutest projects made from old tee shirts. I have a few that were in the Goodwill pile, but now I'm thinking I'd like to see what I can do with them (inspired by everyone else's great projects, of course!)

I've gathered six shirts that I can use, with half of them earmarked for something for the baby.


That Houston Texans tee and the red & white tees are going to be perfect for something for Baby T, especially since his birth basically coincides with the start of the 2010 NFL season. I'm sure his first Sundays and occasional Mondays are going to be spent glued to the TV with Daddy T learning all about football.

I am not sure what I could use the other three tees for yet, but they'll probably end up being something for me. Perhaps a tote or purse accessory of some sort.

Lots of crafty bloggers are making cute baby accessories out of old tees. But it seems like most of the projects center around girly stuff, which is unfortunate for me. I'm thinking I'm going to have to come up with something boyish on my own.

Does anyone out there have any suggestions on a way to up-cycle some old tees?

Nursery Brainstorming

Despite the fact that the husband's crazy job is moving us to another city sometime later this year (please be after the baby is born, please be after the baby is born, please be after the baby is born...), I have decided that I am decorating a nursery, even if we have to abandon it when we move. I want to, so I'm doing it.

My mom is amazing with a sewing machine. I'm still learning, but I think I'm doing fairly well. My sister is also great but I think she prefers knitting. Anyways, between the three of us, I know we'll whip up an elegant but unique nursery. Actually, elegant my not be the word I'm looking for, but oh well.

In the beginning stages of my planning, I really only had these specifications:
1. No store bought nursery bedding sets
2. No happy dancing smiling cartoon animals

I also had to decide what color furniture to get. White or wood? If we went with wood, it has to be the espresso finish, because that's just what both the husband and I prefer.


White

Espresso

But would that go well with white beadboard wainscoting? I really want white beadboard wainscoting. Decisions, decisions. For now we're leaning towards the espresso furniture. But I really want that wainscoting...


Idea


Idea

One day while pondering the nursery, I had a lightbulb moment. Classic cars. Muscle cars. Race cars. Our boy is going to grow up around cars because that is one of his daddy's favorite hobbies. In addition to a 1998 Mustang GT (slowly being turned into a Cobra), we have a 1968 Mustang that will eventually be restored to her full glory. I'm sure Senior and Junior are going to be spending lots of bonding hours in the garage with these ladies.

So I thought the car theme would be perfectly fitting. I ran this past the husband and he thought it was a great idea. Of course he did.

What about this artwork? I love it. Actually, each square is available separately as well, and I think that's the route I would go.


I've also seen a vintage looking service station sign that can be customized with the baby's name. I'm forgetting where I saw it now, and of course I can't find it in my bookmarks. I'll keep searching.

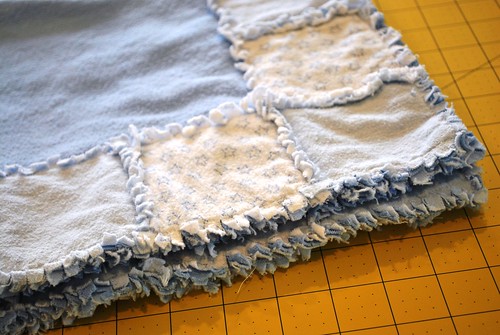
As for bedding, my mom and I will be headed out to the big fabric store downtown soon. I'm not really sure what I'm looking for yet, but I'm sure something will jump out at me. We'll do a valance for the small window, a blanket that can be draped over the side of the crib for decoration, some throw pillows for a chair and some bigger pillows for the floor. I'll probably use one of the many tutorials I've seen around the sewing blogs for a changing table pad as well. I'm not planning on doing bumpers. I think we'll make the blanket bigger than crib size so that the baby can use it on his toddler bed later and it won't look too small. I am also on the lookout for a gently used glider & ottoman set. I plan on recovering the cushions in a coordinating fabric.

And finally, this baby of ours definitely needs this as his very first Mustang.

Monday Brunch


I was in the mood for some eggs, and it was almost lunch time. I had some potatoes left over from something else, so I knew I'd use those to make a quick, yummy meal.

Peel and dice two small potatoes, microwave for a quick minute to soften them a little. Toss with salt, pepper, and garlic seasoning. Add a little olive oil and a pat of butter to a nonstick pan, pour in the potatoes and let them brown on one side before moving them around. Once browned all over, they may need to drain a bit on a paper towel. Top with some fried eggs, add a side of fresh fruit and tomatoes, and there's brunch!

Perfection


Ice.
Banana.
Strawberries.
Apricot.
Kiwi.
Blend.

It's me....Mario!

Here's a sneak peak of a quilt I'm making for my husband for his birthday.


I stupidly ran out of thread. I was just at Joann's today! I guess I thought I had a magical, unlimited spool. :)

I'll have to start this again on Monday when the husband goes back to work.

Raspberry Pinwheels


I have been looking through my bookmarks lately in hopes of making some of the recipes and printing them off or crossing them off the list for good. Today I decided to do the Raspberry Pinwheels that I have had bookmarked since the holidays.


I'm so glad I did! I found the recipe on Real Simple, and I didn't deviate from it, so feel free to head over there if you decide to make these as well. They are very delicious. How could they not be delicious? The dough is made from butter, cream cheese, sugar, vanilla and flour. Cream cheese! I have honestly never made a dough that has cream cheese IN it. Yum!

Repurposed Receiving Blanket Tutorial - Scrappy Style


This blanket is made of one flannel receiving blanket and the scraps from the Raggy Style blanket. I had one blanket left that had no staining on it, so I decided to use it as the backing for what I had in mind for using the scraps from the other blanket.

Trim off the rounded parts of the long scrap strips to make long, skinny rectangles. I didn't worry about widths because I wanted a scrappy, handmade look. I ended up with 12 strips (the pictures all have 11 in them initially because I lost one of the strips in the scrap pile somewhere, and then found it later).


Line them up on the table in an order that is pleasing to your eye. Even though this is scrappy, I'm still too much of a perfectionist to be totally random with this. So I arranged them just so.


Then sew them together with a 1/4 inch seam. Press the seams to one side.


Trim for a neat edge on both sides. We'll now call this the top.


Lay the top on your full blanket and then trim so that they're the same size.

The applique steps are optional. You also may opt to embroider instead. I decided to applique an initial onto the backing. I used some of the 4 inch squares from the Raggy Style blanket. Cut the initial from one of the squares. I used a pencil to draw it. Make sure you draw it backwards onto the wrong side of the square.


Position your initial wherever you want on the backing. I threw another 4 inch square behind it first because it looked lonely all by itself. Pin it down and then applique it on using a thick decorative stitch. Don't forget to reset your stitch when you're done!


Pin your backing to your top (wrong sides together) and then sew together using a generous 1/4 inch seam on all sides. Then settle in and cut some fringe with your scissors.


Wash and then dry for the scruffily edges!


And that's it. One more free blanket to warm up a tiny kid.

Repurposed Receiving Blanket Tutorial - Raggy Style


This is a tutorial for turning old flannel receiving blankets into a cuter, warmer Raggy Style blanket. Now, the technique I've used for this blanket is like a rag quilt. You could Google instructions for rag quilts if you want, which is what I did initially. But I had these blankets to use as fabric and they didn't come in specific yardage, especially because they stretch and change shape a little as they get used and washed. I found it much less frustrating to just figure this out on my own. So this is what I came up with.

Grab four blankets. Trim them to 24 x 24 squares. Try to keep the scraps as long and even as possible if you want to use them to make another blanket (tutorial for Scrappy Quilt). Set two of the least stained blankets aside.


Cut each blanket into 4 inch squares. You should get 30 squares from each blanket.

{You don't need all these squares though, so if you would like to use the fabric for something else later, don't cut all of it. I planned to use the rest of the squares for something else. For this blanket you really only need 12 of each. Cutting the whole blanket into squares helps to pick out the stained squares. I just think it's easier this way, especially if you can use the leftovers for something else.}


Get out the two 24 inch squares that you set aside earlier. Decide which one you want to use as the backing and which one you want to use as the top. Set the backing aside.

Decide which color or pattern you want to be on the four corners. Take one square from that color, and pin it directly onto a corner of the top fabric (right sides up on both), matching the angles. Sew the 4 inch square onto the corner of the 24 inch square with a 1/4 inch seam.

{If you're pinning on your new dining room table top, make sure you keep your cutting mat on the table as protection, or Lucy is gonna have some 'splainin' to do when the Hubs gets home :P}

Now you're going to go get your trusty iron and blow all the dust off it, you know, because you have a really dusty house, not because it never gets used. Locate a seam on one of two sides that is not on the edge of the 24 inch square. Press it open (meaning, fold the fabric back over itself and press it so that the wrong side is up).


Lay a 4 inch square (the other color) next to the sewn square, overlapping the seam that you pressed open. Pin it secure and sew it all the way around with a 1/4 inch seam. Now repeat for all the squares until you completely line the perimeter. We'll call this piece the top from now on.


Now take that last 24 inch square that you had decided to use as the backing and sew it to the back of the top, making sure if it is patterned that the pattern is showing and not sewn on backwards.

{If you want, you can embroider or applique something to the backing BEFORE you sew it onto the top. I didn't think to do this until AFTER I had sewn it on. Phooey.}

At this point, grab your scissors and turn on the TV and sit on the couch while you cut all the seams into fringe.


And then you just wash and dry it to get the fringe to turn all raggy and scruffily and cozy and wonderful.


And there it is. A cute, warm blanket for your favorite kid, and you didn't have to spend a dime. Stay tuned this week for another tutorial using the scraps. We'll call this one the Scrappy Style quilt.

Repurposed: Receiving Blankets

I had gotten a box of some hand me down stuff for the baby, and to be honest, I wasn't interested in most of it. I really appreciated the gesture in my heart, but some of the stuff was over worn and kind of stained or discolored. I did pick out a few sleepers that weren't too worn out.

Actually, I picked out stuff that DIDN'T have monkeys on it. Most of this stuff had the vile creatures on it and I just don't like those things. So the stuff that wasn't too worn out that did have the devil animals will go to the donation pile. The rest I thought maybe I could repurpose in some way.

I found a stack of flannel receiving blankets and picked out 4 that had a cute pattern and all coordinated. I cut two of them up into 4" squares because those ones had the most staining and I was able to discard the squares with stains.

Then I made this:


I was really excited to reuse some old stuff that wouldn't have been eligible for donation due to stains. I'm even in the process of using the scraps from this blanket to make yet another blanket. I have the top made already and I think it looks really good. Still churning up some ideas on how to do the backing, but I suspect I'll be ready to share the finished product this evening or at least tomorrow.

I made it out of four flannel receiving blankets ONLY (and thread and a sewing machine obviously!) so it would be a great way to use up some stuff that's just lying around the house.

Tutorial for Raggy Quilt.

Tutorial for Scrappy Quilt.